Devil May Cry 5 Marketing Material
Working alongside the guys at Maverick Media & Capcom I was tasked to re-create a moment from the Devil May Cry 5 launch trailer as a standalone animation and print artwork. Below is the final animation and print artwork completed using Cinema 4D, Octane, Substance Painter, Blackmagic Fusion and Photoshop.

Breakdown
Prepping Capcom Assets
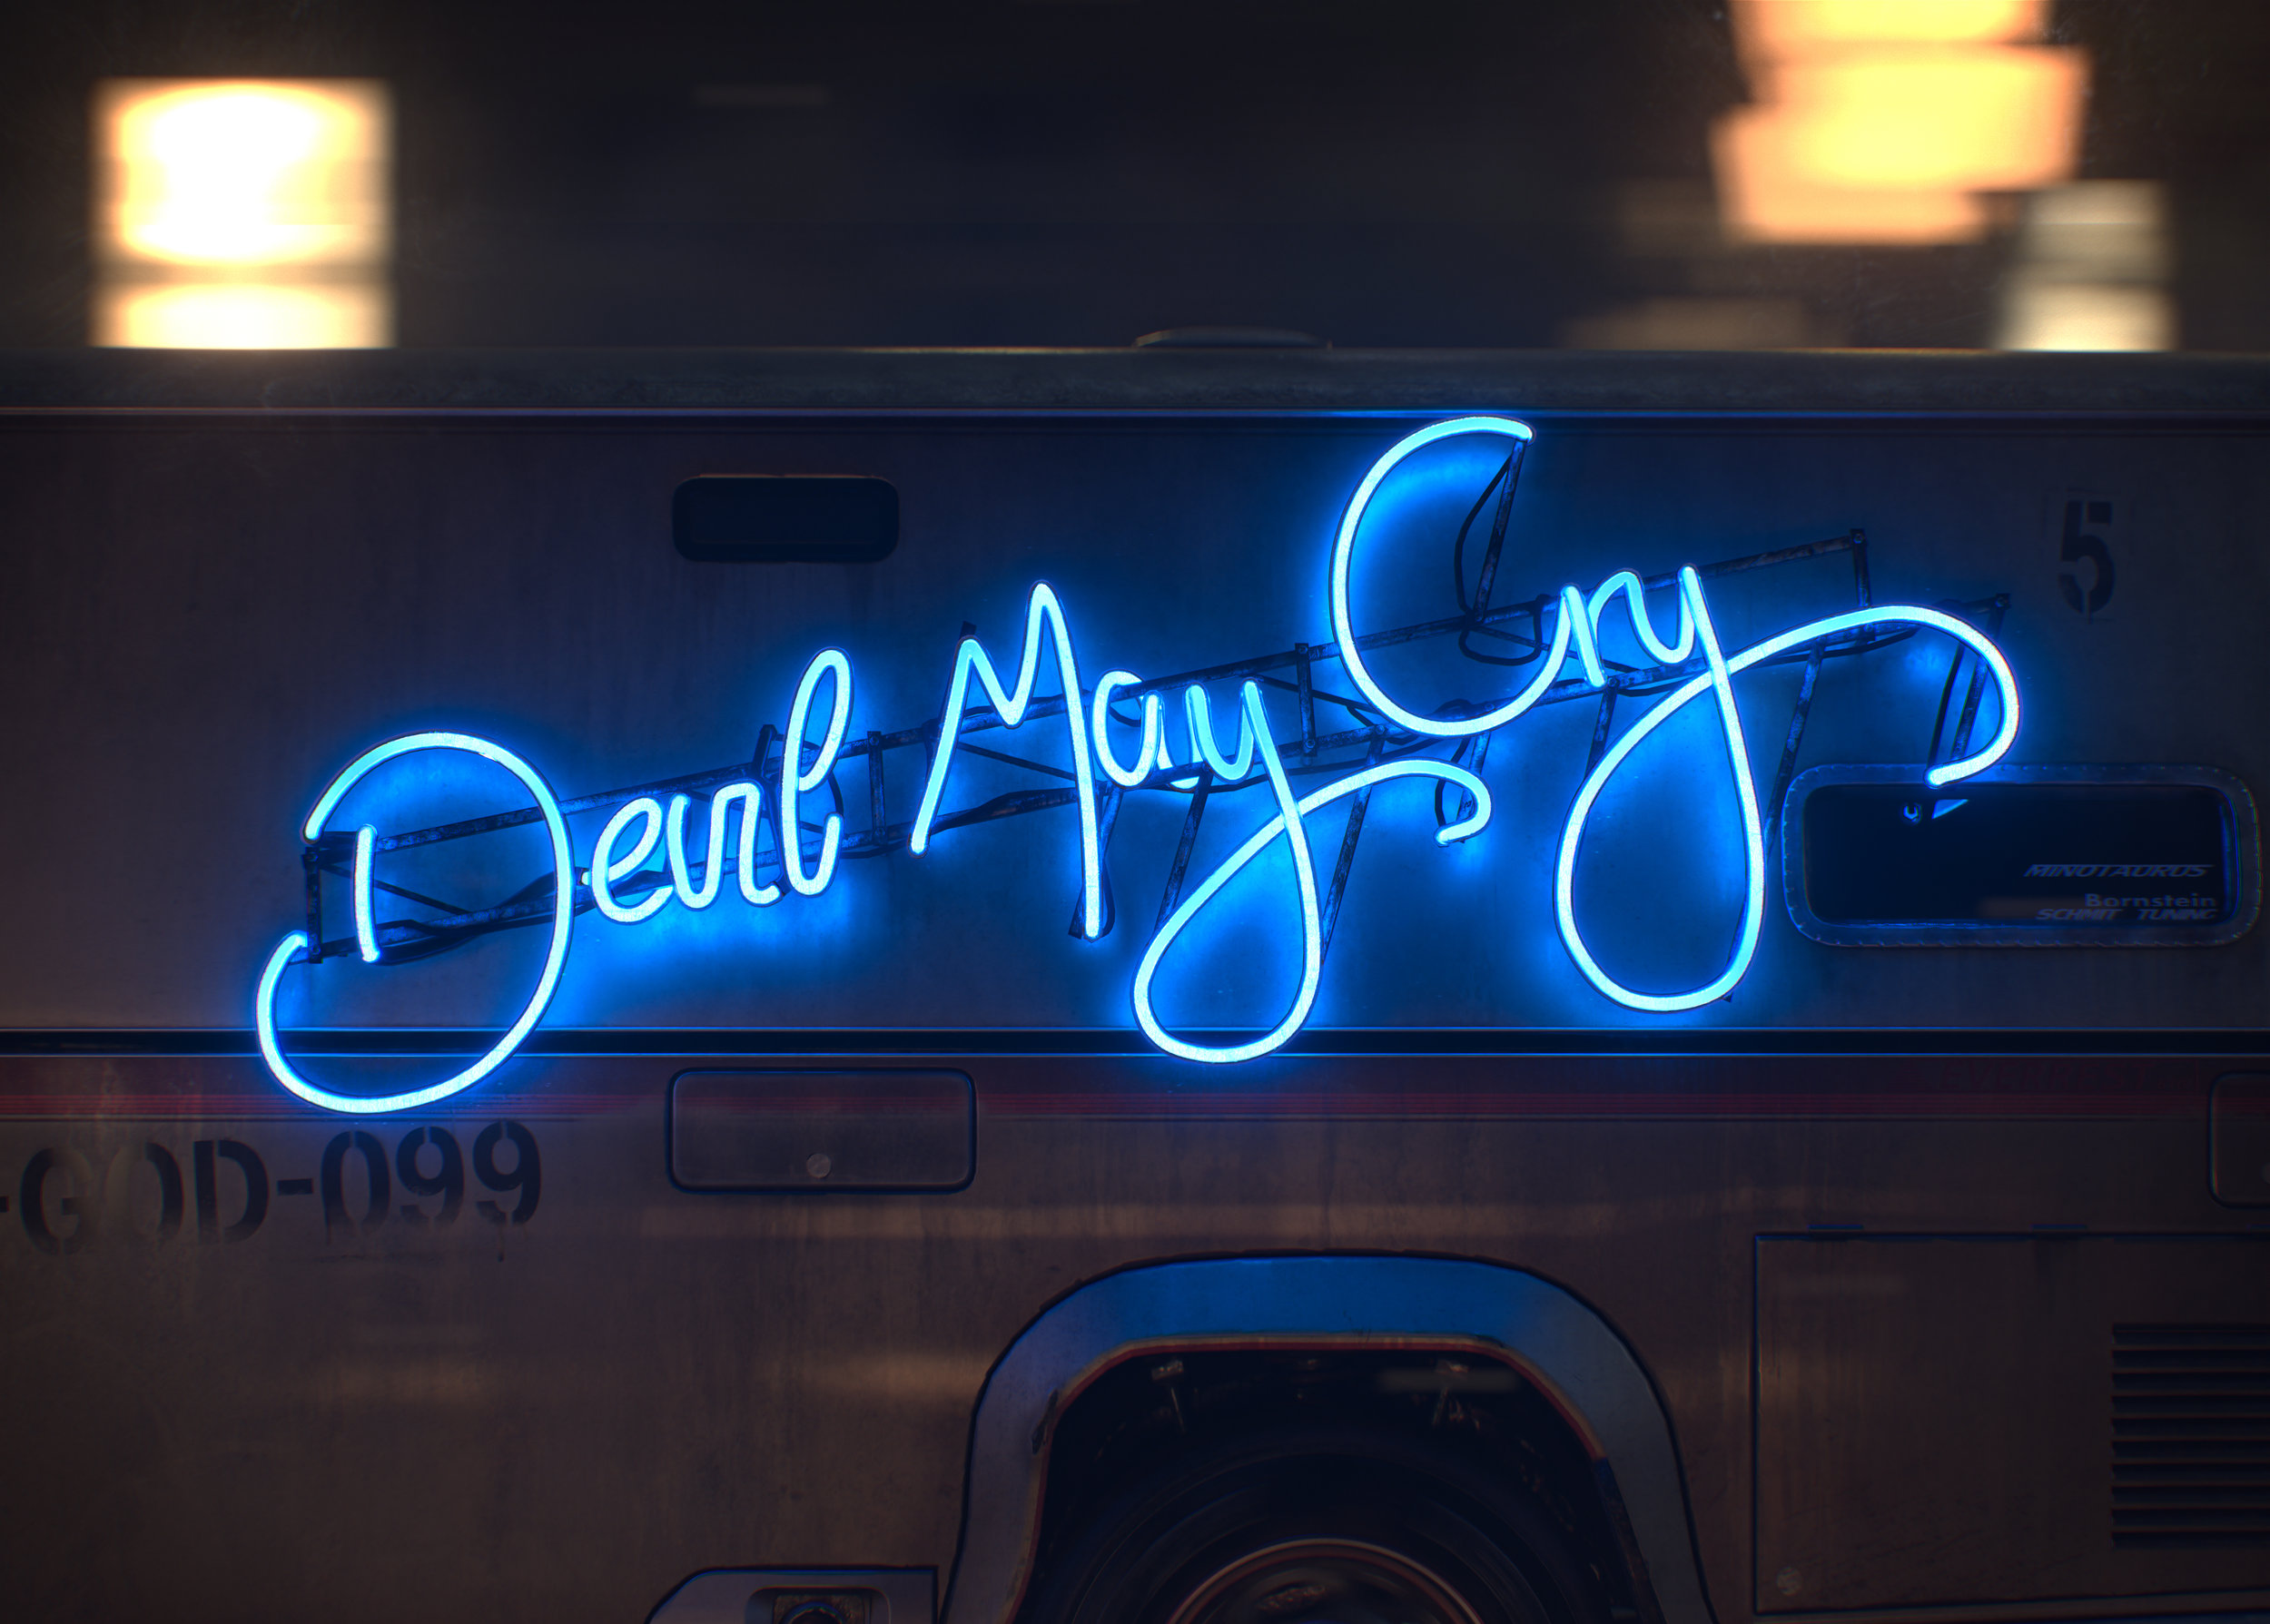
My first stage in tackling this project was to prep the van asset that I recieved from capcom. As I knew I would be using a PBR workflow with Octane and Cinema 4D I needed to modify the van asset to fit accordingly. Luckily I did recieve the diffuse and normal textures for the entire van, so I had a solid buidling block to start from.
As you can see it was extremely heavy as it had been lifted straight out of the project for the trailer which was all done in engine using unity, so I removed everything I knew I wouldn’t need or see in my animation such as the entire van interior as well as the front as I had just been briefed to only show the neon sign on the van.
Texturing
The next step was to re-uv the sign for texturing inside substance painter. As this was a game asset the UV space for the sign rack was actually quite small as they had squeezed a lot of the other elements of the van into the same tile.
So I sepereated the sign out into its own poly group away from the rest of the van, and then took this over into to 3D coat to quickly unwrap it and get my standalone UV space just for the sign rack. This would then allow me to creat the 4k texture I knew I would need for the details to hold up on a print size render.
For the neon letters I didn’t want to waste time UVing each one as they where just going to be some worn glass anyway, so this was done inside of Cinema 4D and Octane using texture mats from Poliigon.
To the right are images of the Van and the Sign inside of substance painter, where I made use of smart materials and masks to texture the sign and van inside of half a day and of the octane shader network for the worn glass.


Cinema 4D Scene
Below is a screenshot of the scene inside of Cinema 4D. It was fairly simple setup as I kept the van static with just a couple of vibrate tags on the camera and the van null to fake some movement. And then had the background building in a cloner animating from left to right to fake the idea of the van speeding down a street.
Entire scene with lighting and camera’s inside of Cinema 4D.